Showing posts with label DIY. Show all posts

Tuesday, July 23, 2013

Reusing toddler paintings

My kids have a sweet easel which they use love and abuse.
 I am happy to provide water, paper and new watercolors etc on occasion. 
And because I was a born and raised saver I like to use things to their fullest extent. So when we've appreciated a painting long enough it goes into the re-use phase. 
 I like to use their random paintings because most often at the ages 2-4 they are quite lovely color washes. I hand them scraps of card stock and then later use them to make greeting cards, or cut up their work to use on bag toppers or other crafts. 
We use the large paintings as wrapping paper etc. 

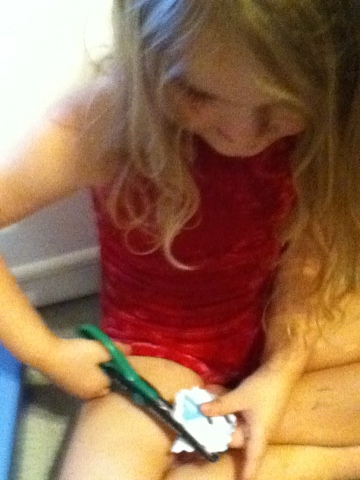
My mother in law showed us how to make crafty 3-D flowers. They kids enjoyed it a lot. However, flowers in nature aren't perfect and I don't have those scalloped dye cuts but I do have little hands that are learning to use scissors so on occasion I have set them to work cutting circles with those fancy pattern scissors.
I then have them arrange their circle-ish shapes in order of size and have them select graduating sizes. 
At least 4. I poke a hole in them all and they put a brad through. 
They crumple them up and then open it back up.
Pretty.
They usually do a few of these and then go on to another project and I save their circles and flowers for when I want to embellish something. 
I also ready their easel with new paper and card stock for the next time they get a hankering to paint. Which I hope is soon because I need more card stock color washes for cards. :)

We both win. They get to practice cutting and sorting and fine motor. I get to reuse their art and pass the pretty along. 

Wednesday, April 3, 2013

Bathrooom redo

The half bathroom has always bothered me since we moved in. It is shoddy all around. An access panel was cut and instead of fixing it it was covered with wainscot and then painted with a random color, it was poorly hung and didn't match any other wainscot in the house. And it had floral wallpaper... do I even have to describe why that was ugly, not to mention that it was peeling off. The pedestal sink allowed no storage and the little shelf that was in there was a bit water logged and the kids kept pulling the towels off it and carpeting the tile with them.

The kids pulled the towel rack out of the wall... so that was another beauty mark. The caulking at the bottom of the toilet was done poorly and stained. The mirror backing was peeling off on the bottom and the sink had issues draining.

One day I decided I was serious about fixing it and so I started removing the wallpaper. This said to Gary, "I'm serious and I want it now." But things are never that fast so we worked on it when we could we have kids and all that which come first.

I was finding the before image and Nev who is almost 4 says, "That is ugly." Yes, it is dear.
The after pictures don't even show new baseboards, toilet caulking redone, new light fixture (square since I broke the other one on accident while painting, and yes it really was an accident) etc. and my bathroom art on the right wall. And look at all that STORAGE. Just what I needed. The sink drains and everything.

I still have some detail work to do on the frame around the mirror, it has a leaf pattern that I was going to add some accent touches to but haven't gotten to it. (I've been obsessing over my carpets lately)

I am so much happier with it. It is right next to the dining room so the grossness of it REALLY bothered me. I feel so much better now. :)

Saturday, January 5, 2013

a bedroom for boys

This is a continuation from this post.

We finally gave up on the wallpaper that was on never ending back order and bought it somewhere else. Let me say:
1. I have perfect color vision (see here) 
2. I couldn't have chosen the comic book grey any better if I had had the wallpaper we wanted with me when we bought the paint months before.
3. The decals stuck really well. No issues.
4. they need to work on the adhesive for adhesive wallpaper... probably why it was on never ending back order... it has some issues sticking for which we purchase Aleene's Tack it over and over and that seems to be doing the trick.
5. Yes, I fixed the clock face numbers.
6. Lucky boys.

Wednesday, December 5, 2012

a bedroom for boys: almost done


My little boy turned 5 recently. Since we moved into this house the boys room has been an eyesore. I've been dying to get rid of the ugly elephant wallpaper and edge to edge blah color. I mean the baseboards were even painted the same color, and closet doors... He's never had a room that really was his, since he shared with his sister before. So it was time we rewarded the little boy who keeps his room so clean. Seriously, his is always cleaner than the girls'.

We finally got around to beginning it and emptied out their room. Z was SO excited to sleep on the floor and had been dying for his turn since his sisters did while they waited for their new bed to be put together.
 
First I had to remove that awful wallpaper border. Which thankfully wasn't as hard as I thought it was going to be. My mother in-law had to help me get over my fear and get to it. :)

Zurich has wanted a Spiderman room for a while now so of course we went with that. I wanted a paint scheme that would age well though so I had it in my head to do a cityscape silhouette at twilight in comic book greys, which are really more blue and purple. Gary couldn't envision what I was describing but went along with it anyway, what a dear.

He left me to pick out the paint by myself and he went to get the wallpaper... What? you are supposed to match the paint with the wallpaper? no.... I think it will all work out though.

Gary came in from working on the beds and taped off a few visually identifiable silhouettes, and I worked on the general buildings. Tip: paint top color first to the lowest point your buildings may dip then tape off building lines and roll or brush into paint. I didn't roll down far enough and had to touch up some later, but I had to do that anyway so it's not a big deal. I had my basic line at 33 inches where a chair rail would go and had some higher and lowers along that line.

I'm pleased with it.


We also had a set of bunk beds from my days growing up. Sturdy suckers. However, when we moved here we chose to keep some brand new mattresses in the house and found they were xl twin. So we had to make new side rails to lengthen the bed. We just covered up the unfinished wood with bed skirts in the mean time.

Gary and his Dad decided to make some necessary and some pretty modifications to the beds and sand them down and re-stain and gloss them to match the dresser. It turned into a pretty big project but they sure turned out pretty.
Here is the room partially put back together so the boys could sleep in their room again. Giddy is still in the crib so that will free up space when he moves to the bed. 


While waiting for the wallpaper and decals to arrive we haven't put any of the pictures back up and I was missing the clock. So I got his Thomas clock and decided it would be easy to add a Spiderman face to it. The blue border would work well. Of course we are mildly out of black ink and its 10:30pm and Gary is gone on a business trip so I decided the little ink failure adds to the effect. Don't judge me. I'm moving on with my life.

I used the image from here: http://everdaylittlethings.blogspot.com/2010/10/spiderman-head-svg-mtc.html and stretched it a little to make it circular. Downloaded the free spiderman font that had numbers here: http://www.1001fonts.com/homoarakhn-font.html  I reversed out the 3 and 9 with a little text rasterizing and erasing.

Snap the thing back together and I can hang it up tomorrow when kids aren't sleeping. Gary said he will pick up more ink on his way home tomorrow... The numbers run into the border a little. Hmm maybe I will fix that and print it out again... maybe.

Saturday, November 24, 2012

A room for girls

Nev has had an issue with sleeping in a bed since we moved here. She kept falling out of the toddler bed and Gary or I would have to go get her when she'd cry from falling out in the middle of the night, sometimes multiple times. Well she got fed up with it and soon we'd  put her to bed and about a half an hour later she'd sneak her blanket and doll and pillow pet and sleep on the floor next to her sister's bed. Since she was happier there we learned not to interfere and found other means of lowering her bed and giving her a bigger sleeping space than the toddler bed gave her. That also freed up the Toddler bed/crib for her baby brother.

However, I felt like it was time to do something about the mess of their room and I thought that Nev was ready to sleep a little more elevated. So I searched around for bunk beds. I had a strong impression that a ladder bed was not the right solution for the girls and so I started looking for stairway beds. I found this one via Amazon at Bunk Bed King and was happy since it was white, and said it was made of solid wood.


Gary and Olea sorted all the pieces and organized them so it was easy for us to put it together while the girls slept in the art studio.
This also worked out nice so that it was not suspicious that we had the bed mats set up for their Grandparent's arrival a few days later.
 We were able to get it all done except one of the under bed drawers since one of the pieces was missing the groove cut out down the side.
Thankfully we have a nice neighbor with a table saw and he was able to rip it for us the next morning after the mattresses arrived.

The girls' room had a paint we were happy with and it matched some of their existing pieces well enough so we have just stuck to the color excitement instead of pinking out the room to the point of vomit. I really like it now. We put in new blinds too, which is great since the other ones were broken and had lost real function and their room faces the street.
We have changed out the wall shown in this pictures since I took these pictures by adding the book shelf (used to be changing table Hensvik from Ikea) since it was white and Giddy doesn't really need the changing table anymore and Olea needed a place for her books. We also moved the dress ups into the closet.

A few more things I want to do: switch out the fan blades (the boys room has blades that match and theirs match the wood finish we are planning on doing in the boys room) and the dangly thing on the end of the fan and light chain. Gary also wants to sand down their dresser and paint it white.

Here is the magic. Their room has never been cleaner, consistently and without nagging. The right piece of furniture can make all the difference! The girls and Gary and I are so pleased with it. No painting required. :)

Sunday, February 19, 2012

Valentines

I didn't worry about Valentine's in January as I normally would have because we were gearing up for a trip West and my oldest would miss the valentine's exchange in school.... but recent turn of events we didn't go on our trip and so I had to figure something out. I wanted something that she could have a hand in putting together and she wanted to make the packets like we did for Gary. So I sat down to put together a little card for her with more appropriate messaging... and then had an idea and ended up making some for the older kids, just because I could because it was so fast and I had the pictures to work with already.

It's not a novel idea given all the examples you can find of picture/sucker valentine's all over the internet, but the spin we put on it was fun and personal and the kids were proud to put them together and give them.

Olea used the silly picture cards with candy packets for friends at church (I didn't get a pic of one of her's made up but you can use your imagination if I you've looked at Gary's from last year.)

She used the archery shot with the suckers for school.


Zurich and Nev gave out theirs to their friends at church.


While making up the packets for Olea's little cards, Zurich wanted to make one that had him on it, so I drew a pic really fast and had him draw the body. I get such a kick out of this. It's so cute.

As soon as the picture was done and I had taken a picture of it he ripped it open and ate the treats. :)

Friday, August 5, 2011

Summer's end: Bleach T-Shirts


Today's project took a lot of prep work but the results were flipping awesome!

Olea was the photographer for most of the pictures, not that you'll notice a difference but.... :)

Yesterday I had the kids pick a design from the Disney Cricut cartridges I have. (thanks Mom) Then I cut some out on vinyl and some on card-stock. There were reasons for the different materials but I won't go into it just yet.

I put some scrap board in each of the shirts to create stiffness and prevent bleed through.

Zurich's design was just the regular base (Cricut people, you know what I am talking about right?) so I got out my scalpel and started connecting cuts and adding more. That took a fair amount of time. Then I transferred the vinyl to the T-shirt, which would have been easier with transfer paper, but alas, I have none.

I used card stock on the words for Olea's shirt just to try it. Cut it, use spray adhesive and place it. I thought this would be the best method for the back of Zurich's shirt since he had floating letters. I was right. Much easier. I put the whole thing down to spray it with adhesive (all pieces like a puzzle) and then transferred it to the back of his shirt and peeled away the parts I didn't want. Last night I laid out all the shirts with their stencils on them.

Today I put 50/50 bleach and water in a spray bottle. Put out some scrap paper on the lawn and got out some gloves (again, thanks Mom). I brought their shirts out and them after a quick discussion on how dangerous bleach is and the importance of being obedient so this could be fun.

I helped the kids spray their shirts and ooh and ahhh. Did one side blotted it with a paper towel and then flipped it over and bleached the designs on the back. I might have been a little too cautious about over bleaching. I thought it would continue to process so I didn't want to leave it on to long and we let them dry in the sun a bit and then threw them in the washing machine. I washed it without soap and then a quick wash with soap and dryer it. The kids were pretty psyched about them.

Knowing what I do now I might have sprayed it a few more times for the kids designs. But honestly I like the distinct lines but subtle contrast. I'd totally wear one. I'm a tad jealous. I got the kids' shirts at the dollar store a few months ago and they only had smalls. When Gary got home he was totally impressed with them.

Friday, June 24, 2011

Thomas Clock

Zurich was helping me un-pack stuff earlier this week and saw this clock. (Which was never hung in my house but kept for the works for projects such as follows).

He said, "I want a Thomas clock, Mom."
"Ok son."
He wanted Thomas, not James, I checked a few times.
So I painted the red part blue. It would have been smoother and easier with spray paint, but I don't have any so I used the acrylic paint I had. Two coats.

This face all ready existed on the internet, just waiting for me.
Found here, super cute costume idea.

So I printed it out to the right size and poked a hole for the clock works. Lined up the face and stuck it on.

Re-assemblage of the clock. Make sure when you do so that you line up the hands straight up at 12. So as to have the clock tell appropriate time when setting it. (You guessed it, I skipped this step and hand to take it apart to fix it.)
Simple enough. I thought about adding a little more detail stuff, but he was just happy as can be at it the way it was, so I figured I would leave well enough alone.


Three of his favorite things, clocks, Thomas and Cars. Life is pretty good.